Scarabæus
| Scarabæus | ||
|---|---|---|
 | ||
| Game No. | 99 | |
| Voting | 7.94 points, 32 votes | |
| Developer | Peter Barna, Istvan Cseri, Laszlo Mocsay, Csaba Nagy & András Pohl | |
| Company | Andromeda Software | |
| Publisher | Ariolasoft | |
| Musician | Csaba Nagy | |
| HVSC-File | /GAMES/ S-Z/ Scarabaeus.sid | |
| Release | 1985 | |
| Platform | C64 | |
| Genre | Arcade Adventure 3D | |
| Gamemode | Single player | |
| Operation | ||
| Media | ||
| Language | ||
| Information | Called Invaders of the Lost Tomb in North America | |
Description[edit | edit source]
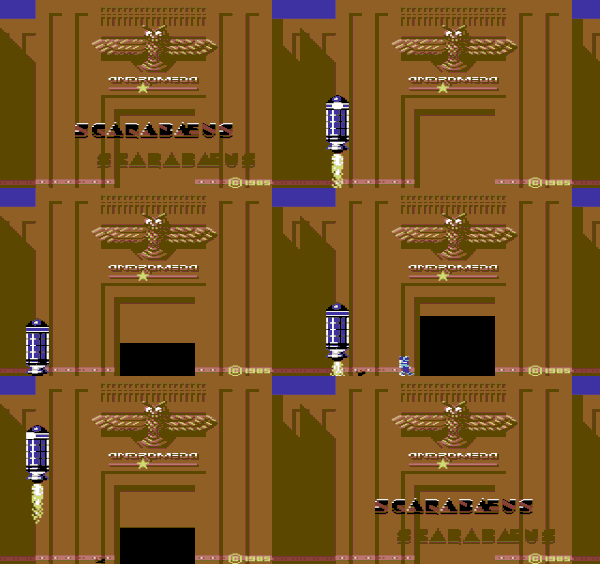
Scarabæus is a 3D adventure game made by Andromeda in 1985. It is also known as Invaders of the Lost Tomb in North America.
The game starts with the player landing his spaceship near an Egyptian tomb. He wears a spacesuit and is followed by a dog. His aim is to collect the ancient treasure of Scarabæus, a smaragd in the shape of a dung beetle kept inside the tomb. Although it's not shown in the presentation, the explorer gets bitten by a spider upon entering the temple. The tomb contains several vials with an antidote, and several others with poison, and the explorer must solve some puzzles that will reveal which ones he can drink and which ones he must avoid. He also must survive hostile monsters that will try to kill him.
Design[edit | edit source]
The game is divided into three maze-like floors, each with its own goals. The ultimate target is to survive and recover the Scarabæus, held in the Pharaoh's Tomb.
Along the way, the player needs to keep an eye on the explorer's health, shown on the instruments on the right of the screen. These indicators consist on the following:
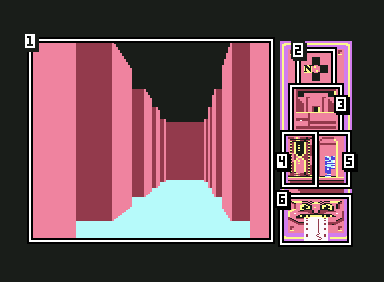
- Gameplay area - The explorer's first-person view of the maze.
- Compass - Gives the player an idea of what direction he is facing. The map, however, is easier to read.
- Tomb - A vague representation of where you are in terms of which floor you're on. In order to see an actual map of the area, hold back on the joystick.
- Hourglass - Overall game time limit. Maybe it represents the air supply. It ticks down very slowly; once it empties, the game is over.
- Doorway - This doorway represents the explorer's health. It slowly wears down (the door opens vertically) because of the spider bite. It is possible to recover lost health by drinking medicine vials on the bottom floor, but not before, so the player must advance through the top and the middle floors quickly. Once the door opens completely, the game is over.
- Electrocardiogram - Shows the explorer's heart rate. This displays in a different form the same information that the doorway shows. The lower the explorer's health, the faster his heartbeat will be.
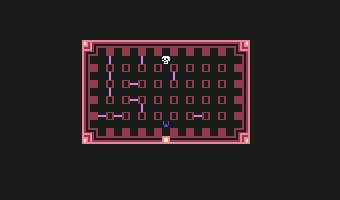
To view a map of the area, hold back on the joystick. Keep in mind that viewing the map does not pause the game, so enemies can still move freely while you check the layout. Some things which appear on the map are:
Elevators, alcoves, skulls and zombie traps can be depicted with different colors, but those colors don't have any particular meaning.
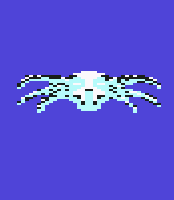
These are the monsters:
 |
 |
 |
They all are slower than the explorer, but contrary to him they don't lose time turning around a corner. A monster can walk the distance of a tile in the same time it takes to the player to walk a tile and turn 90 degrees around a corner, so that both can circle a column in the same amount of time.
Keep in mind that this game has its fair share of buggy moments. The strategies listed below assume that the game is working as it should.
Top Floor[edit | edit source]
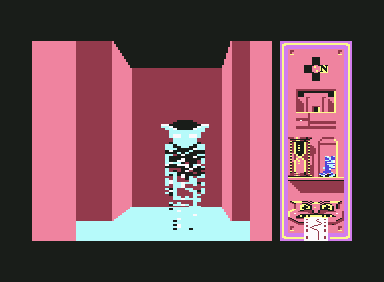
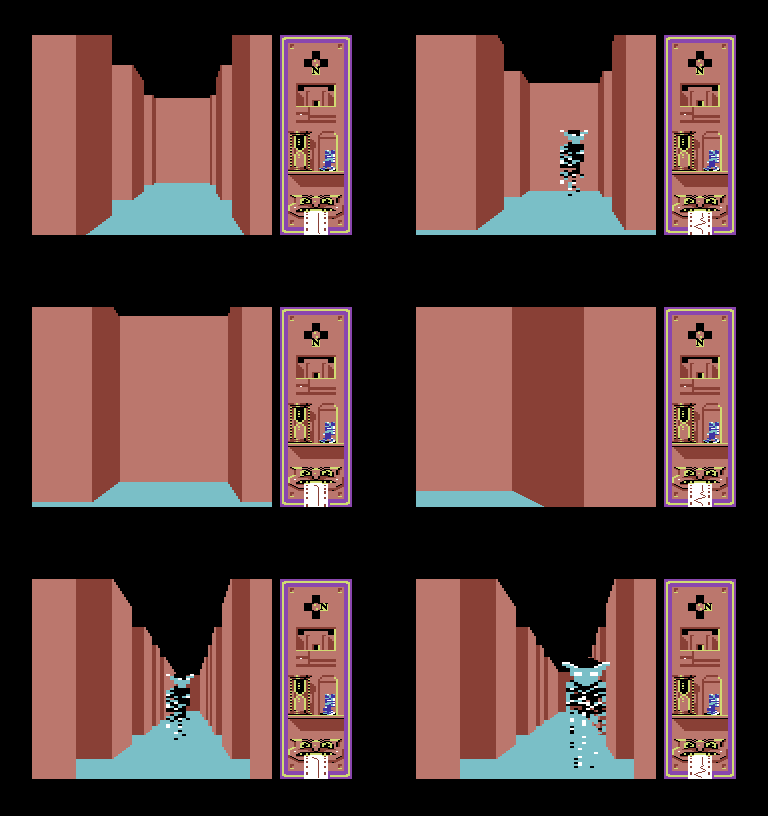
The player starts on the first level of the tomb, with magenta-colored walls. A mummy (marked by a skull on the map screen) wanders the corridors, and the player must catch it.
 |
 |
When the player catches the mummy, they receive a hieroglyph, which the explorer automatically notes down on a 3x3 grid. Another mummy will spawn somewhere on the floor, and the explorer will need to continue catching it until 9 hieroglyphs are collected, after which no mummy will appear anymore. Collecting all of the hieroglyphs is critical, as the next set of puzzles are impossible to solve without them.
Mummies move along random paths, so for a slightly easier glyph-hunt, look at the map for a few seconds and see which direction the mummy is moving, then try and anticipate where you can cut its way:
 |
You can press the fire button at any time to see your current hieroglyphs collection:
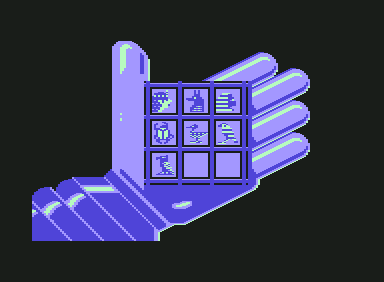 |
When you reach the next level, you will need to remember all of these symbols and be able to identify them quickly. Due to this, it is useful to be familiar with all 16 of them. They are, in order:
 |
The scarabaeus, the eye, the ankh, the hand, the foot, the Sphinx, the man, the woman, the girl, the vulture, the crow, the duck, the sparrow, the cobra, the rattlesnake (which, by the way, doesn't inhabit Egypt) and the jackal. Also, drawing the 9 glyphs retrieved on a piece of paper is very useful. As you may notice, some of them resemble each other; this is done to confuse the player.
Middle Floor[edit | edit source]
This is a grueling preparation floor. The walls and floor are now blue, and your objective now is to decipher puzzles hidden in alcoves using the 9 hieroglyphs you collected on the floor above. To view the collected symbols, bring up the map below.
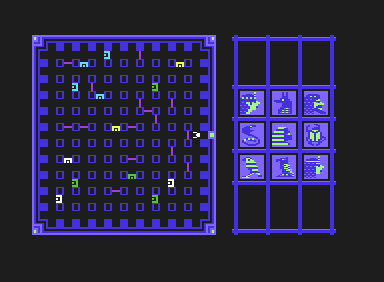
There are 13 alcoves on this floor, and each one contains a puzzle and a spider. When you walk past an alcove (never approach one directly unless you're sure the spider has left it), a spider appears and slowly begins following the exact path the explorer takes. If the spider, following the explorer's path, reaches its original alcove, it's going to re-enter and stop pursuing the player. However, if it spider catches up the explorer, it's going to bite him and disappears, causing an injury of variable gravity. Going into the elevator will immediately reset the level, and every wandering spider will come back to its nest.
There are several known glitches that govern spiders' movements. For example, if the player crosses his own path, making an 8-shaped walk, the spider will shortcut its march, following the shortest way. If the visited alcove is in a cul-de-sac, then the player will necessarily come back on his own steps, and the spider will continue to follow the player along the shortest path, without ever coming back to its nest. In this case the only option is to go into the elevator. Under certain conditions, spiders that find themselves in a corner with a wall north and another west will stop and stay there indefinitely.
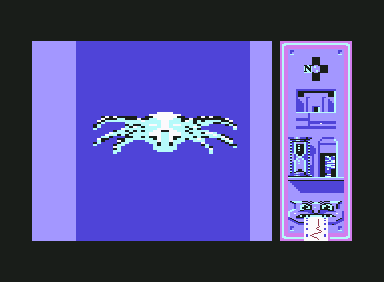
A reasonable strategy for outrunning spiders is to run around the maze and hope you have built up enough of a lead so that you will have enough time to decipher the puzzles before they catch up. The only problem with this is that while walking the explorer loses health, so that is not possible to make 13 tours of the floor without taking some medicines from the bottom floor in between.
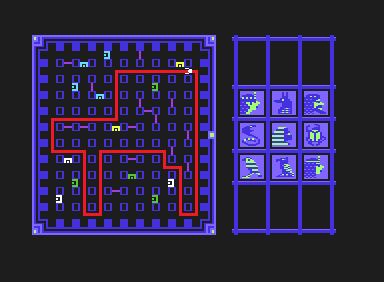
This is an example of a long path that would give the explorer plenty of time to solve the puzzle on the yellow alcove without triggering the pursuit from a second spider. Apart from the difficulty of remembering and following it on the first person view, the energy lost making it is fairly the same of an average bite, which would also make disappear the spider. It's not possible to make with the available energy 13 tours of such length. Remember also that while the player loses time turning around a corner, monsters don't, so a path with many angles gives an inferior advantage over the monsters than a straight one.
Whatever the length of time you decided to give yourself for the puzzle, is not a good idea to interrupt your work in the alcove just to check where the spider is. For instance, spiders and zombies make a screeching noise when approaching, giving the player plenty of time to escape. Also, doing so would mean losing plenty of time just to exit the alcove, check the map, and re-entering it. If you made a little tour it will burn out most of your time, if you made a big tour an eventual bite wouldn't make more harm than the delay you just spoiled.
12 alcoves present themselves with a screen like this:
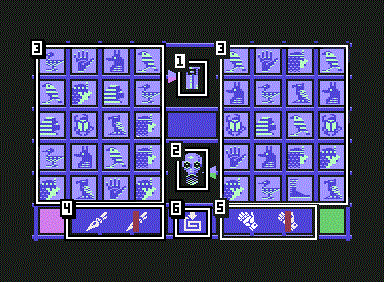
- Vial - Note that these vials are not actual vials that you can take; they represent an identically designed vial on the bottom floor.
- Zombie Trap - Looks like a gas-mask for some weird reason. Used on the bottom floor to get rid of zombies. Press fire to lay one where your explorer is currently standing.
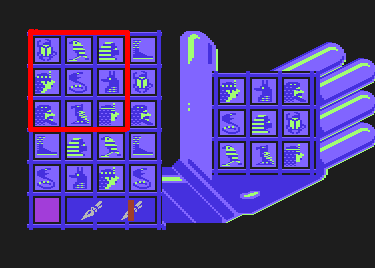
- Hieroglyphs - There are 2 sets of hieroglyphs: a violet side, which concerns the vial, and a green side, which concerns a zombie trap. Remember the set of 9 glyphs you collected on the top floor; if you can see all 9 appearing in any order on a 3x3 grid anywhere on the violet side, you can mark the corresponding vial on the bottom floor as safe. If this holds true for the green side, you can take a zombie trap. Keep in mind that you can choose to do both.
- Pen symbols - These appear underneath the violet set of hieroglyphs (left). If this set contains the 9 glyphs you collected on the top floor in any order on a 3x3 grid, select the pen without the red line going through it and press fire. This will cause the vial to appear on the bottom floor's map screen, indicating that it should be safe to drink. If the glyphs don't match, select the pen with the red line going through it. It means the corresponding vial on the bottom floor should contain poison, and won't show up on the bottom floor's map screen.
- Hand symbols - These appear underneath the green set of hieroglyphs (right). If this set contains the 9 glyphs you found on the top floor in any order on a 3x3 grid, it is safe to take the trap; select the hand without the red line going through it. If the glyphs don't match, it's better to leave it and exit back to the maze.
- Maze symbol - Returns you to the maze.
Among the 12 vials depicted on the middle floor and present on the bottom floor, 8 are filled with medicine, 4 are filled with poison. Among the 12 potential zombie traps on the middle floor, 4 are indeed working zombie traps, 8 will just injury the player if he tries to take them. Here is an example of a vial's puzzle which has all 9 glyphs:
1 alcove presents itself with a screen like this:
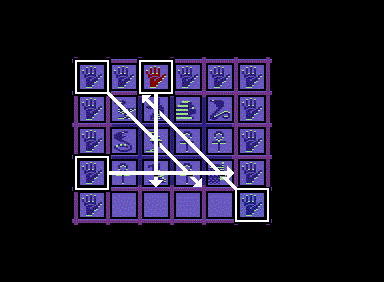
In this puzzle there are 12 tiles that show an ankh on one side and a different symbol on the other. The goal is to flips the tiles so that they all show the side with the ankh. However, you can't flip one tile at a time, but only entire lines (horizontal, vertical or diagonal) at once. The hands on the sides let you select which row to alter.
Solving the puzzle will grant you the Pharaoh's Key. It's used to unlock the Pharaoh's Tomb puzzle on the bottom floor in the case you block it using too much moves to solve it. It can be used only once, and only if it's retrieved after blocking the Pharaoh's Tomb puzzle. If you took it before, then it's useless.
Remember that while you are inside an alcove studying these puzzles, the spiders will be moving. There's a specific version of the game where the spiders will disappear if you solve all the puzzles.
Bottom Floor[edit | edit source]
This is where you will see the fruits of your labors on previous floors. The level is mainly brown, and you can see the Pharaoh’s Tomb in the center and 12 alcoves. Each one of them contains a vial, filled with medicine or with poison. Ideally, you should have drawn the 8 bottles with medicine and collected 4 zombie traps.
Every time you visit an alcove for the first time a zombie will appear somewhere in the floor. Unlike the spiders and mummies, zombies choose their own movements and usually try to catch the player. If a zombie catches up to the explorer, it will bite him and will teleport to its original position in the floor, causing an injury of variable gravity. To get rid of the zombies, place a zombie trap with the fire button (you can check the location of where you placed them by looking at the map sub-screen) and try to lure them into it. The traps won't hurt the explorer, so a good strategy is to stand over one, wait for a zombie to approach, and move away just as one is about to catch you. Usually, they will walk over the trap while trying to pursue the explorer. Since the player has to act as a bait for the zombies to come to the trap, there is little need for placing more than one.
There are several known glitches in this floor too. Sometimes a bug causes the internal walls of the bottom floor to be inconsistent, so that the explorer can walk through them from east to west while zombies can't. If you lay a second zombie trap on the floor, the first one will sometimes disappear, but can reappear if yet another one if laid down.
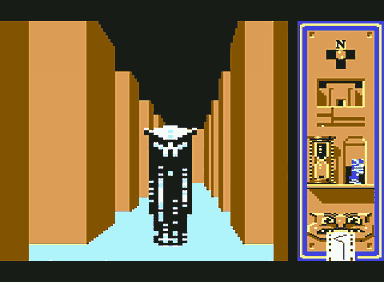
If you've checked your map upon arrival on this floor, you will notice two things:
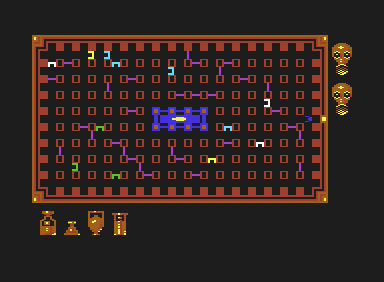
the right of the screen lists the number of zombie traps you have at your disposal, and the bottles that were marked as safe (pen symbol without a red line going through it) will be lined up across the bottom. Keep them in mind, you'll need to remember them. When you reach an alcove, you are presented with a screen like this:
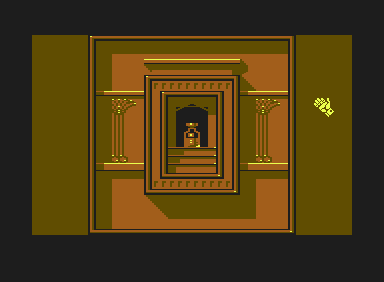
If the bottle matches one that appears on the bottom of the map screen on this floor, it means that it should be safe to take, unless there was a mistake with solving the relative puzzles on the second floor. To take it, select the hand symbol and press fire. If it's not listed on the bottom of the map screen on this floor, select the maze icon to exit. If you drink a bottle with poison, you will die instantly, if you drink a bottle with medicine, a variable amount of your health will be restored. Health restored in excess of the maximum is not lost. Even if the Doorway can't show it, the health is stored and can be used to sustain a future damage, it slowly declines and is counted for score purposes at the end of the game. Inside the alcove is not possible to see the list of vials drawn on the middle floor, so it's useful to be familiar with their shapes:
 |
Every time you drink a medicine you will unlock part of the solution for the last puzzle inside the Pharaoh's Tomb. Without drinking at least 7 of them, it's not possible to know for sure how to place its tiles in order to solve it.
Remember that while you are inside an alcove or the Pharaoh's Tomb the zombies keep moving. Taking all the 8 medicines will make zombies disappear. Once you visited all the alcoves and got rid of the monsters, head to the Pharaoh's Tomb in the center of the floor for the final puzzle:
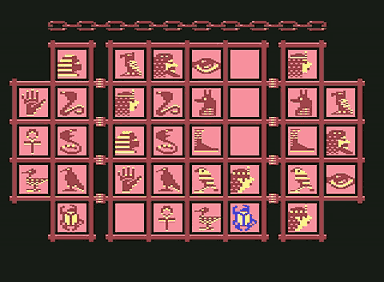
This is a 4x5 tiles sliding puzzle which must be completed in less than 40 moves, indicated by a 40 links chain whose links materialize one by one as every move is made. You can move the cursor to select a tile, then hold fire and press up, down, left or right to shift the tile in that direction. Note that you can shift multiple tiles at a time using a single move if a tile you move push other tiles. The solution to the puzzle is on the outside of the 4x5 grid. The 2 columns on the far left of the screen indicate where each tile should go on the left-hand side of the grid. The 2 columns on the far right of the screen indicate where each tile should go on the right-hand side of the grid. For having a full vision of the solution you must have drink the 8 vials with medicine on the bottom floor. If you use your fortieth move, the puzzle is blocked, even if this move solves it. To unlock it, you can retrieve the Pharaoh's Key on the middle floor, provided you didn't take it already, in which case is useless. If you use the Pharaoh's Key you have 39 more moves, the fortieth blocks the puzzle again, with no way to unlock it a second time. However, you can still move the tiles while it's blocked, which effectively gives you an unlimited number of movements to solve it.
Once you've solved the last puzzle, the treasure of Scarabæus is finally yours:
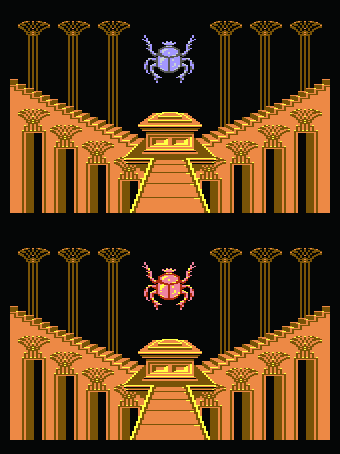
Elevator Sections[edit | edit source]
When it's time to move on to a different floor, or the player feels they have forgotten something on a previous floor, the elevator is the (only) transport of choice. It is represented by a brightly-colored square on the edge of the map; its color depends on what floor the player is currently on.
To descend, you must rotate the joystick anti-clockwise, making sure to press every eighth direction (up, up-left, left, down-left, down, etc.) until the walls change color, indicating that a different floor has been reached. It takes 15 wheel turns to go from a floor to another. Hold your current direction and press fire to get off. To ascend, rotate the joystick in the same fashion clockwise. If the player misses even one of these eighths, or lets the joystick return to the neutral position, the elevator plummets to the lower floor. The explorer then loses a portion of health on impact, proportional to the fall.
The player is free to move between floors at any time regardless of how many things have or haven't been collected. Note that this is the only other part of the game, except the title screen, where the explorer's dog appears.
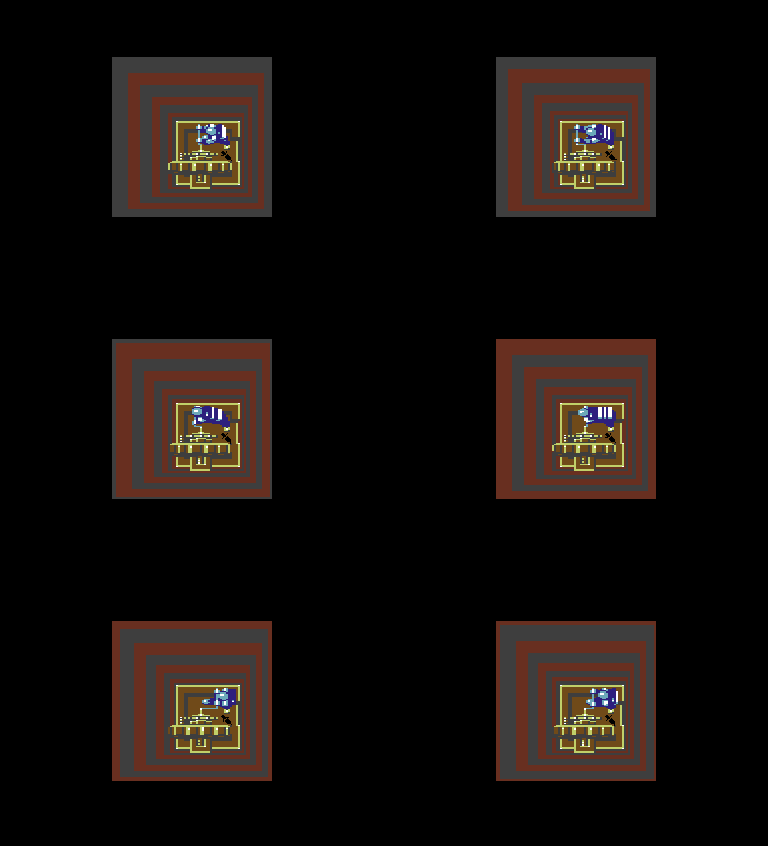
Score[edit | edit source]
The score is calculated in a complex way. First, the collection of several items gives you the following points:
| Description | Meaning | Points |
| Hieroglyh pieces | Collecting each of the 9 hieroglyphs on the top floor and thus allowing the solution of the vial and zombie trap puzzles | 500 |
| Decisions | Solving each of the 24 puzzle on the middle floor and thus marking vials as safe or unsafe and taking or leaving zombie traps | 1,000 |
| Pharaoh's Key | Solving the Pharaoh's Key puzzle on the middle floor and thus obtaining the Pharaoh's Key | 5,000 |
| Medicine taken | Taking each of the 8 medicines on the bottom floor and thus allowing the solution of the Pharaoh's Tomb puzzle | 10,000 |
Then the points obtained are used on a broader calculation:
| Description | Meaning | Points |
| Remaining | It consists on the points obtained collecting the items from the above table with a negative correction linked with the time elapsed according an unknown formula. If its result is negative points are not deducted from the other achievements. | <113,500 |
| Medicine bonus | It consists on the overall health gained during the game minus the energy decline due to time passing and the eventual injuries sustained, according an unknown formula. It's awarded only if the player drunk all the 8 medicines on the bottom floor. Because of this, it can still be positive in case of death because only the losses of energy occurred after taking the eighth vial are deducted, any injuries or decline experienced before is not considered. | <~140,000 |
| Magic Scarabæus | It consists on the prize obtained after solving the Pharaoh's Tomb puzzle on the bottom floor, which also makes win the game. | 100,000 |
| Pharaoh bonus | It consists on the overall time left, according an unknown formula that makes big leaps between a score and the next. It's awarded only if the player wins the game. | <~80,000 |
Despite games conventions, spiders killed, zombies killed, zombie traps spared and moves spared when solving the Pharaoh's Tomb puzzle are not considered in the score.
Hints[edit | edit source]
Maze Sections[edit | edit source]
 - Move forward.
 - Turn left/right.
- Hold
 to view the map.
 - At any time, you can check your current score with the H key, and toggle the music on or off with M . Remember that, while checking your score, the game timer will keep ticking.
 - Check current hieroglyphs (top floor only). Place a zombie trap (bottom floor only).
Puzzle Sections[edit | edit source]
Elevator Sections[edit | edit source]
- Rotate the joystick anti-clockwise to move down, and clockwise to move up. Remember to hit all the directions (left, down-left, down, down-right, right, etc.), because missing even one causes you to fall and lose health.
How to solve the Vial and Zombie Trap puzzle[edit | edit source]
In the game there are 24 vial or zombie trap puzzles and it's not possible to ponder long time on all of them, so it's important to know how to solve them fast. First of all, you have to choice the easiest glyph to spot in your collection. For example, on the image below it can be the scarabaeus, since visually it's an oval light dot. The ankh, the eye, the hand and the foot are peculiar too, but you should avoid the others, since they intentionally resemble each other.

When you watch a puzzle, you will search for a scarabaeus. Here there are 2, but if you don't find any, that's enough for discard the puzzle. Then you have to visualize the 3x3 grids of which those scarabaeus are part. You can see on the image that on a 4x5 grid you can select just 6 3x3 grids. One, here highlighted, is on the top-left corner. The others are on the top-right corner, on the bottom-left corner, on the bottom-right corner, on the center-left edge and on the center-right edge. You will then notice that the 2 scarabaeus can be part of just 3 of the 6 3x3 grids: the first fits only in the upper-left grid, the second on the upper-right and center right. This method allows you to exclude half of the possibilities just with an eyesight.
You will then look for a second correspondence, possibly not with one other peculiar glyph, but with a whole group. For instance, you could notice than in the picture you have all the 4 heads of the game. It could be some other set, like the 2 serpents, the 4 birds, or any group you can easily identify. You will notice that on the grid you analyzed you found indeed all the 4 heads.
You will then look for a third correspondence, if you can again for a whole group of glyphs. On this case you need to find 2 of the 4 birds, the vulture and the sparrow. You will notice that on the grid you analyzed you found them.
You will then look for a fourth correspondence, and possibly the last one. Since you have only 2 glyphs left to check, you can easily remember both, even if they are unrelated, on this case the jackal and the rattlesnake.
With a little practice, you will discover is not difficult to check the last 4 symbols at once, which makes a 3 steps method to check a 3x3 grid within a puzzle. As soon as you find a single 3x3 correct grid within a puzzle, like on this example, you can validate it and pass to the next one. As soon as you find within a given 3x3 grid you are analyzing 2 identical glyphs or an alien symbol, you can discard it and start to check the next 3x3 grid. If you find with an eyesight that 1 of your 9 glyphs is missing entirely from the puzzle, then you can discard it. If you checked all the potential 3x3 grids within a puzzle without finding a match, then you can discard it too.
How to solve the Pharaoh’s Key puzzle[edit | edit source]
In the game there is only 1 such puzzle, which is also very easy. There is no way to explain how to solve it without using complex mathematical speech, but there is a very intuitive hint you can follow. The hint is simple: you have to look for order, any kind of order. Since you have 11 lines of 3 or 4 elements, each one of them in 1 of 2 states (positive or negative), you will surely find some. Order in a line means the tiles are either all positive, all negative, on alternate state, on symmetric status or on reverse symmetric status. Some of these definitions overlap, and thus all positive means also symmetry, all negative means also symmetry, a 3 elements alternate state means also symmetry, a 4 elements alternate states means also reverse symmetry. Overall, each line can be either symmetric (simple or reverse) and thus ordered, or asymmetric and thus disordered.
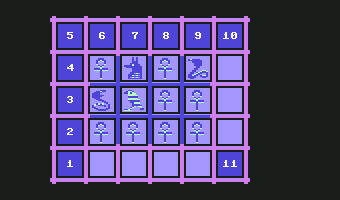
On this example you can find order as described on lines 1 (alternate state, symmetry), 2 (all positive, symmetry), 3 (reverse symmetry), 4 (alternate state, reverse symmetry), 5 (alternate state, symmetry), 6 (alternate state, symmetry) and 8 (all positive, symmetry). That means 7 lines over 11. You can try to reverse (pushing the joystick button) any of them and see if overall you have more order than before. In this case line 4 was changed:
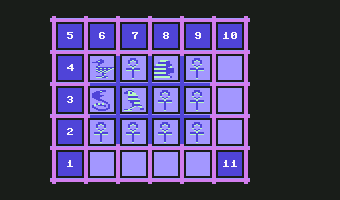
At this point is impossible not to notice that changing line 1 will render homogenous all the vertical lines:
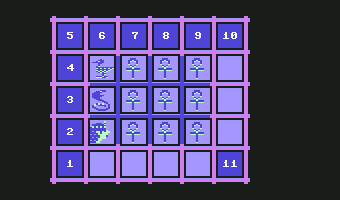
And now only a last movement:
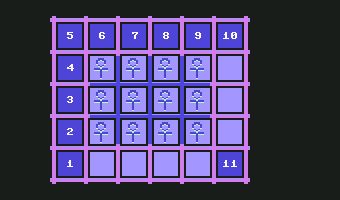
It takes an average of 4 operations to solve the puzzle, and there are many different ways of solving the same puzzle with a given number of moves, like in this case 3. Even random trials will lead sooner or later to the correct solution.
How to solve the Pharaoh’s Tomb puzzle[edit | edit source]
In the game there is only 1 such puzzle. If you killed all the zombies with zombie traps or they disappeared because you drunk the 8 medicines, you can think as long as you want on how to solve it. If you didn't take already the Pharaoh's key, you can use unlimited moves to solve it too.

Usually the tiles are already pretty well ordered, so the first thing to do is to find the 6 tiles that go on the center, knowing that the other 10 will go around. You should put those 6 on place without messing too much the others. At this point, even though they are far from their correct place, the other glyphs will be almost on line, so that turn them on blocks clockwise around the center will put most of them on the correct position. If you didn't move them too much in the beginning, now you should just switch 1 or 2 couples of glyphs in order to solve the puzzle, and with 4 empty places that's pretty easy. An experienced player could foresee the external line suited order since the beginning, and obtain it on the same time he orders the center, sparing few moves.
On the picture above, the center is in order and the external ring is already aligned, you just have to turn clockwise the tiles around the center. Note that the tiles could be far more scattered than they are on this game: if they were ordered randomly in the beginning, these advices would be worthless, and you should order the puzzle by little groups of 4, 6 or 9 tiles at a time, according to your skills, using far more than 39 moves. Indeed, the only true problem is the moves' limit, which forces the player to think for a global solution since the start.
Cheats[edit | edit source]
At the moment there are no cheats known for this game.
Solution[edit | edit source]
Voting[edit | edit source]
| Voting of the C64-Wiki users (10=the best vote): | ||
| 7.94 points at 32 votes (rank 122). You need to be logged in to cast a vote. | ||
| C64Games | 7 | 18th November 2007 - "very good" - 473 downs |
| Lemon64 | 7,8 | 28th October 2007 - 33 votes |
| Kultboy.com | 8 | 29th July 2008 - 2 votes |
| ASM | 10/10 | Edition 4/86 |
| ZZap64 | 96% | Edition 85/12 |
Reviews[edit | edit source]
Robotron2084: "Scarabæus is a real jewel, that has never received the attention that would have been rightly due. It just drips from atmosphere and devilish-meanly ingenious, though slightly mazy game mechanisms. The symbiosis from 3D run-action and memory puzzle or respectively crackers is fantastically well done and it is by far the best game that Andromeda Software has ever written. I've played it now for more than 20 years and I am again and again fascinated by it, although to my shame I have to admit that I still haven't played it through. So if one likes solving puzzles under the pressure of time and wants to play cat and mouse with spiders and zombies in a labyrinth, he is totally at the right place here. 11 out of 10 points!"
blubarju: "I can only subscribe to Robotron's view. A software jewel on the C64. Small tip for emulator players: better use a joystick (e.g. Competition Pro) than a joypad, because IMO it is otherwise almost impossible to use the elevator (steady, circular movement with the stick is required). 9 points."
Lynx: "Fantastic music and atmosphere. This game is actually scaring. There are also videos of it on Youtube."
Miscellaneous[edit | edit source]
Cover[edit | edit source]
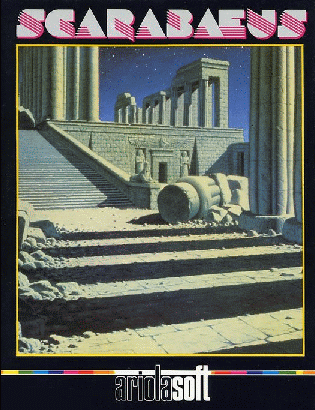
Highscore[edit | edit source]
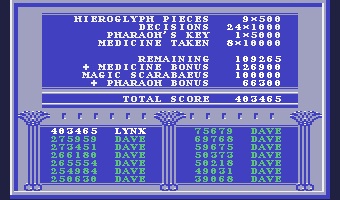
- Lynx - 403.465 (14.07.2011)
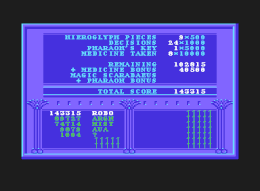
- Robotron2084 - 143.315 (24.11.2007)
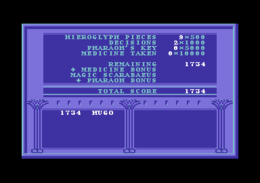
- Hugo - 1.734 (18.11.2007)
Links[edit | edit source]
| Wikipedia: Scarabaeus_(video_game) |
- C64Games.de - Game No. 3601
- Lemon64 - Game No. 2229
- Gamebase64.com - Game No. 6591
- TheLegacy entry no.2642
- ready64 - Game No. 985

- Test Report No. 2125 on Kultboy.com

- ZZap64 test report
- C64endings
- CSDb
Remark[edit | edit source]
This article in the German C64-Wiki "www.C64-Wiki.de" was "article of the month" in November 2007 and "article of the year" 2007.
