User:Testicle/Relaunch64-draft
| |||||||||||||||||||||||||||||||||||||||
Relaunch64 [1] is a free and OpenSource Texteditor, written in Java (licensed under GNU GPL 3). This IDE focuses on C64-Assembler coding on Windows, Linux and OS X. Compared to usual editors, Relaunch64 has a clean and intuitive user interface, yet it offers many features that make coding faster and easier (support for many assemblers, syntax highlighting, code folding, code navigation...).
Unlike other IDE's, Relaunch64 was specifically designed for C64-assembler-coding and hence runs "out of the box". There's no need for complex setups, external plug ins etc.
Versions[edit | edit source]
Latest release is Relaunch64 3.2, in English. [2] Relaunch64 is being developed by Daniel (Testicle/Payday) and Kajtár (Soci/Singular).
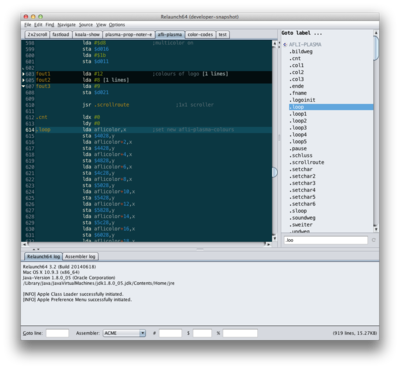
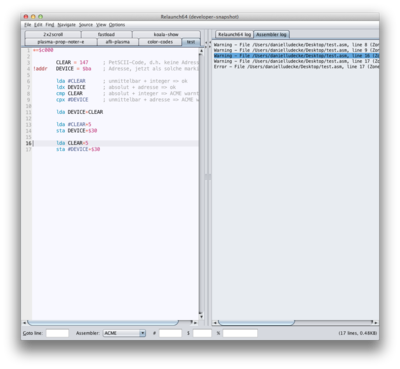
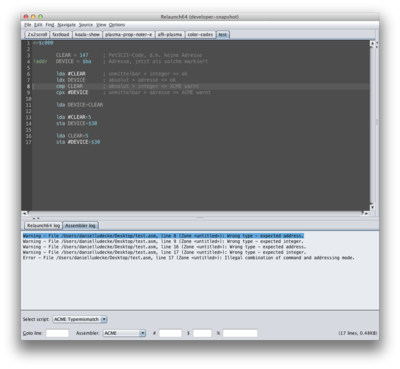
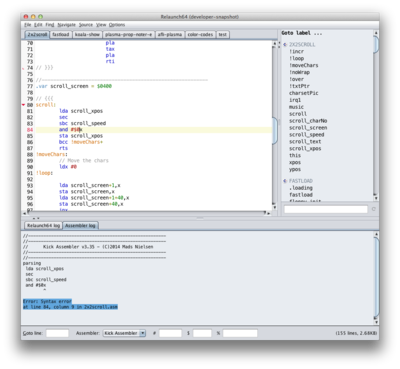
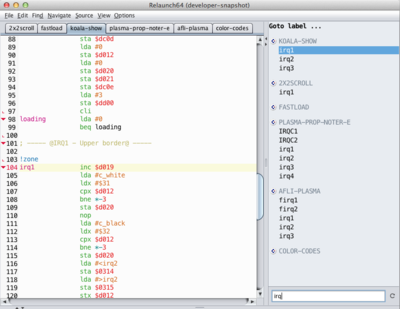
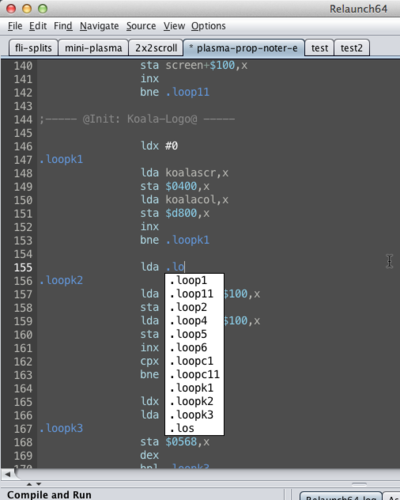
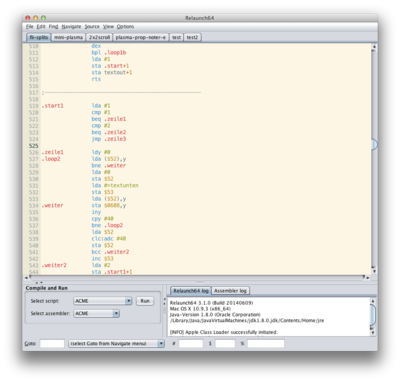
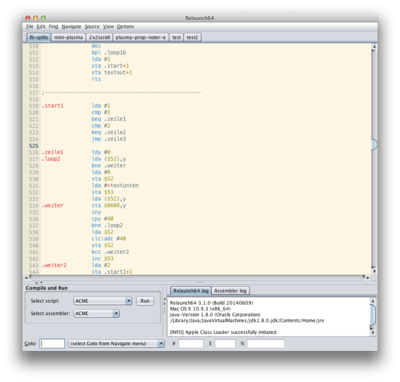
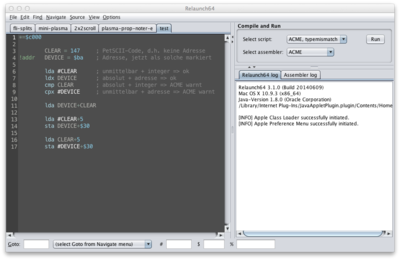
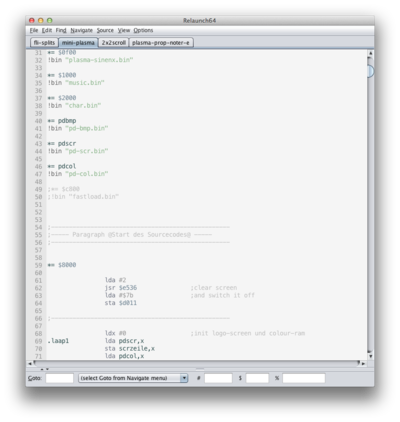
Two screenshots from Relaunch64 in action:
Requirements[edit | edit source]
Since Version 3.0, Relaunch64 requires Java 7 or higher. This is already installed on most Linux-OS. There are free downloads for Windows and OS X. [3]
Supported cross-assemblers[edit | edit source]
Following cross-assemblers are supported by Relaunch64: [4]
Setting up Relaunch64[edit | edit source]
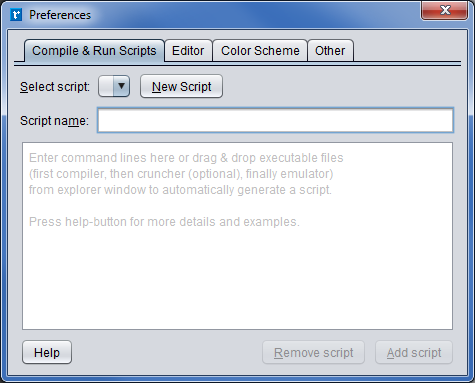
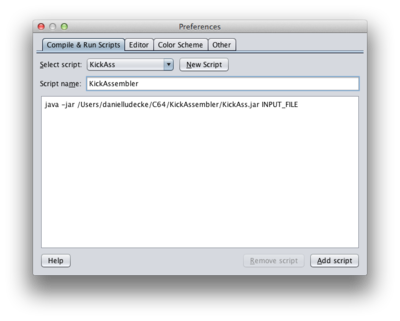
There's no need for complex setup when you want to use Relaunch64. To compile and run sourcecodes, you only need to define user scripts. These scripts are similar to command line scripts or terminal commands and will exactly be executed like those. You can define scripts in the preference pane:
Options ⇒ Preferences ⇒ Compile and Run Scripts
This opens following dialog:
Create scripts with drag&drop[edit | edit source]
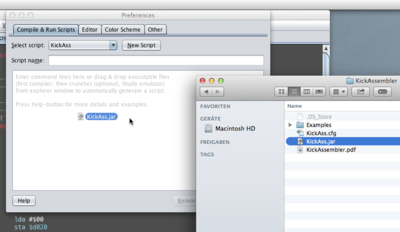
If you are familiar with terminal syntax, you can easily write your scripts by hand. Use a new line for each command line (see examples below). However, you can also let Relaunch64 create the script by dragging and dropping assembler, cruncher and emulator executables into the script textfield. This figure shows an example from OS X, where KickAss.jar is dragged from the Finder (file explorer) into the script textfield:
This can be repeated for crunchers and emulators to add further script lines. Finally, type a name into the textfield Script name and click Add Script. Relaunch64 automatically creates recommended parameters for all supported assemblers as well as for Exomizer and PuCrunch.
Placeholders for parameters[edit | edit source]
To specify directories or input and output files, there are following constants that should be used:
- SOURCEFILE - The input file, typically the asm-file (/path/to/file.asm).
- RSOURCEFILE - The input file, typically the asm-file. The relative path is used. Since the working directory is set to the source file path, only the file name is used, without path information (file.asm).
- SOURCEDIR - The parent directory of the input file, i.e. the directory where the source asm-file is located (/path/to/).
- SOURCENAME - The input file name, without path and file-extension (alternative to SOURCEFILE) (file).
- OUTFILE - The output file that will be compiled, typically the prg-file (/path/to/file.prg).
- ROUTFILE - The ouput file that will be compiled, typically the prg-file. The relative path is used. Since the working directory is set to the source file path, only the file name is used, without path information (file.prg).
- OUTNAME - The ouput file that will be compiled, without path and file-extension (alternative to OUTPUT) (file).
- START - The start address of the source code. This placeholder can be used for cruncher and packer. Since there may be multiple program counters in the source (for several code segments), the start address used to run the source code has to be specified. Relaunch64 uses a comment with "start"-text, e.g. ; start=$c000. As soon as a comment "start=" was found, Relaunch64 tries to extract the specified address to use it for the START-placeholder.
- UNCOMPFILE - The uncompressed file, used as input file for cruncher or packer. Mostly identical to OUTFILE (/path/to/file.prg). Note: if OUTFILE is relative (i.e. if you use ROUTFILE), the relative filename will automatically be used for UNCOMPFILE (file.prg).
- COMPFILE - The compressed output file, used for cruncher or packer (/path/to/file-compressed.prg). Note: if OUTFILE is relative (i.e. if you use ROUTFILE), the relative filename will automatically be used for COMPFILE (file-compressed.prg).
Notes
- In some cases you may have to add the "open" command to the command line (e.g., on OS X, starting Vice will throw an access denied error without the open-parameter). See examples below.
- If you specify full paths to your assembler or emulator and the path contains whitechars (spaces), you need to set the path in quotes (see examples below). Placeholders like SOURCEFILE or OUTFILE, however, will be automatically quoted if necessary. You don't need to quote the placeholders.
- In some cases, using the SOURCEFILE or OUTFILE parameters (full paths) may lead to troubles if the paths contain white-chars (space, tab...). Therefore, it is recommended to use the RSOURCEFILE or ROUTFILE parameters.
Example-scripts[edit | edit source]
- KickAss and Vice on OS X
java -jar /<path to kickass>/KickAss.jar RSOURCEFILE
open /Applications/Vice/x64.app ROUTFILE
- ACME and Vice, both in PATH-Environment
acme -v4 SOURCEFILE
x64 OUTFILE
- ACME and Vice, ACME in PATH-Environment, Vice not
acme --outfile OUTFILE --format cbm SOURCEFILE
"C:\Users\<username>\Documents\C64\WinVICE 2.4\x64.exe" OUTFILE
- 64tass on OS X
/usr/local/bin/64tass -C -a -i RSOURCEFILE -o ROUTFILE
open /Applications/Vice64/x64.app OUTFILE
- KickAss and Vice on Windows
java -jar C:\Users\<username>\Documents\C64\KickAss\KickAss.jar SOURCEFILE
C:\Users\<username>\Documents\C64\WinVICE-2.4\x64.exe OUTFILE
- ACME, PuCrunch and Vice on OS X
/usr/local/bin/acme --outfile ROUTFILE --format cbm RSOURCEFILE
/usr/local/bin/pucrunch UNCOMPFILE COMPFILE -xSTART
open /Applications/Vice64/x64.app COMPFILE
- ACME, Exomizer and Vice, with white chars in file path
"C:\Users\<username>\Documents\C64\other tools\acme 0.9\acme.exe" --outfile OUTFILE --format cbm SOURCEFILE
C:\Users\<username>\Documents\C64\Exomizer\exomizer.exe sfx basic UNCOMPFILE -o COMPFILE
C:\Users\<username>\Documents\C64\WinVICE-2.4\x64.exe COMPFILE
- ACME and VICE on OS X
/usr/local/bin/acme --outfile ROUTFILE --format cbm RSOURCEFILE
open /Applications/Vice64/x64.app ROUTFILE
Updating scripts[edit | edit source]
- As soon as you change the name in the textfield Script name, the button at the bottom right corner changes its label to Add script, which means you can add the content of the script textfield as new script.
- As long as you only change the content of the script textfield, but leave the name unchanged, the button's label changes to Update script, which means you can update the content of the currently selected script.
Compile and run sourcecodes[edit | edit source]
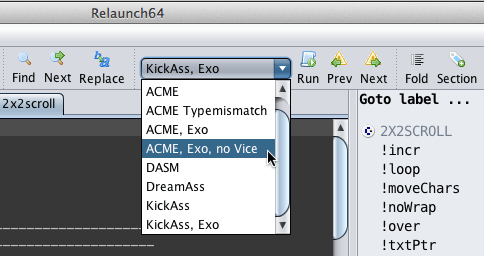
Before you can compile and run sourcecodes, you have to setup scripts. Then simply run the script by using the Run-command in the Source-menu. The currently selected script (shown under logs) will be executed then. Use the combobox or the command Select script from the Source-menu to select one of your script.
The script will be executed and all messages from the error streams are logged.
The most recent script and assembler settings are associated with the source code files. On the startup of Relaunch64, the recently selected script and assembler will be used for the files when they're re-opened again.
Relaunch64 log[edit | edit source]
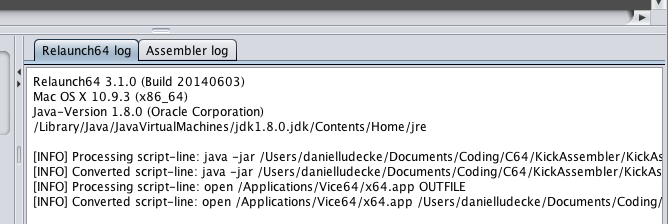
The Relaunch64-log logs all processed script lines and how they were passed to the terminal.
Assembler-Log (or Error-Log)[edit | edit source]
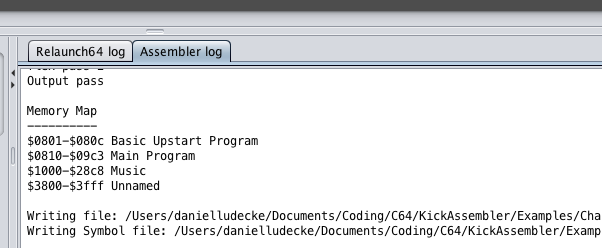
If an assembler, cruncher or emulator produces any messages, either information, warning or errors, these messages go to the assembler-log:
When any warnings or errors occur during compilation of the source code, following happens:
- further execution of the script will be cancelled
- the file containing the error or warning will be opened, and the caret set to the line and column with the reported error / warning
- the current selected error / warning will be highlighted in the error log
Examples
[edit | edit source]
There are two possibilities to jump to error lines in the source code:
- Via the Navigate-menu you can use the commands Jump to next error (Ctrl+F9 or Meta+F9) respectively Jump to previous error (Shift+F9) to jump between the lines with errors and warnings.
- Clicking with the mouse on an error in the error log jumps to the related error in the source code.
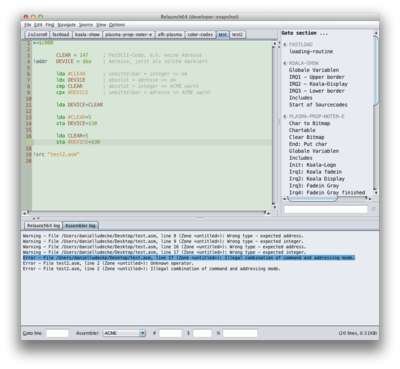
If an error or warning is located in an external file (that was included via import or src-directive, for instance), this file will automatically be opened. In the following example, pressing Ctrl+F9 (Jump to next error) would open the file test2.asm and jump to the line with the error.
[edit | edit source]
The Navigate-menu offers several commands to "navigate" through the source code. Following elements can be targeted:
- Labels
- Functions (not supported by all assemblers)
- Macros
- Sections (Sections are special comments, which can be used as a kind of "bookmark", see menu Source).
- Errors and warnings
- Code-Folds (see menu Source).
There are two different navigate-functions: Goto- and Jump-commands.
Goto-commands[edit | edit source]
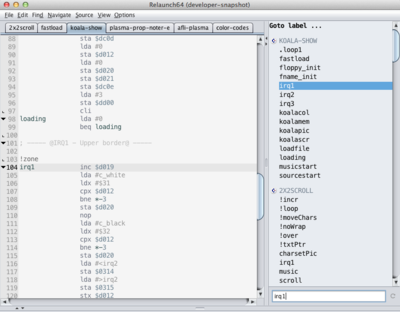
The Goto-commands open a sidebar to the right of the editor. Depending on the specific Goto-command, this list contains all labels, functions, macros or sections across all opened files. At the beginning of the list you'll find the entries of the currently active source code, followed by the remaining opened files. The related file name, to which the entries belong, is highlighted in upper cased grey colored letters, with a small Commodore-icon. See following figure:
There is a textfield under the sidebar, where you can type text to find entries from the lost. The first entry matching the input will be selected.
Once you hit the Enter-key, the list is filtered: All entries that do not contain the input are removed from the list. The following figure shows all labels from all opened tabs that contain the text irq (both at the beginning or inside words).
Jump-Commands[edit | edit source]
Use the Jump-commands to jump to the next or previous occurrence of a label, section, code-folder or error and warning).
Auto-completion[edit | edit source]
While typing, you can activate auto-completion for both a) labels, constants and variables and b) functions, macros or assembler-specific script-commands. To auto-complete a), press Ctrl+Space. Following happens then:
- If there's only one entry that would match the current input, the rest of the input will be completed automatically. For instance, if you have typed "myL" and there is only one label (e.g. named "myLabel") that starts with "myL", pressing Ctrl+Space would insert "abel" to complete "myLabel".
- If there are several possible labels/constants/variables that would match the previous input, the IDE checks whether these remaining entries have more common chars that could be auto-completed, and then opens a popup with all remaining suggestions. Example: You enter ".lo" and press Ctrl+Space, and you have three labels ".loopA", ".loop2" and ".looping" that would match for auto-completion. Now your input ".lo" will automatically be completed to ".loop", as all remaining suggestions start with ".loop". A popup with the remaining suggestions ".loopA", ".loop2" and ".looping" will be shown then. You can now choose between selecting an entry from the popup or typing the remaining chars by hand,
- The third possibility means that a popup appears with all remaining suggestions.
You can complete your input by using the mouse or hitting enter key on the selected entry. Only those entries that make sense will be suggested by the popup! Local labels outside the current scope are not listed!
While the popup is shown, you can continue typing. The list of suggestions will be filtered accordingly.
To auto-complete b) (functions, macros and script-commands), press Ctrl+Shift+Space while typing. The procedure is the same as described above.
The suggestion list is sorted case-sensitively, i.e. entries with upper case letters are sorted alphabetically and appear before entries with lower case letters. To treat upper- and lower-case-entries equally, change the setting Case-sensitive auto-completion list-sorting in the preference pane.
Other functions[edit | edit source]
Comment commands[edit | edit source]
There are following placeholders that can be used as commented line for additional settings when compiling the source:
The START placeholder lets you specify the start address that will be taken as parameter when a cruncher or packer is called during the compile and run script call (see user script examples). The comment line needs following syntax: <comment sign> start=<start address>, for instance:
Kick Assembler:
// start=$c000
Acme:
; start=12288
The script placeholder lets you specify a script that will always be used on compile and run script, independent from which script is chosen in the script selection list. The comment line needs following syntax: <comment sign> script=<script name>, for instance:
Kick Assembler:
// script=Kickass, Vice
(will run the script named "Kickass, Vice")
Acme:
; script=Acme with PuCrunch
(will run the script named "Acme with PuCrunch")
Syntax Highlighting[edit | edit source]
In the preference pane, you can choose between 16 different color-scheme presets. Use Alternative highlighting mode to switch between two different highlight modes: E.g., the one highlights all numbers in one color while the other mode distinguishes between addresses and number-values, see following figures:
Structuring the source code[edit | edit source]
You can insert separator lines, sections or code-folds via the Source-menu in order to structure your source code.
Undocumented Shortcuts[edit | edit source]
- Ctrl+Space - auto-completion of labels etc.
- Ctrl+Shift+Space - auto-completion of functions etc.
- Ctrl+PageUp - select previous tab (OS X: fn+Ctrl+ArrowUp).
- Ctrl+PageDown - select next tab (OS X: fn+Ctrl+ArrowDown).
- Ctrl+Mouse - rectangle-text-selection
- Shift+Enter: new line, without indention
Drag'n'Drop[edit | edit source]
You can drag & drop files from the file explorer (or finder, nautilus, etc.) into the editor area to either open them or include them into your source. The drop operation depends on which modifier keys (shift and control) you hold down while dropping the selected file(s).
Without pressing and holding shift and control keys
- Assembler files (with file extension .a or .asm) will be opened.
- Binary or text files (with file extension .bin, .c64 or .txt) will be included via !bin, .import or .binary directive (depending on the assembler).
Pressing and holding the control key
- Assembler files (with file extension .a or .asm) will be included via !src, .import or .binclude directive (depending on the assembler).
- Binary or text files (with file extension .bin, .c64 or .txt) will be included as byte table (see function Insert bytes from file in Source menu).
Pressing and holding both shift and control keys
- The file path in quotes will be inserted at the caret position.
Changing the layout of log-windows[edit | edit source]
The layout of the log-windows as well as the Compile and Run-area can be changes via the View-menu. Example of side-by-side-layout of editor and logs:
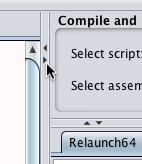
Click on the small arrows of the divider bars to collapse or expand certain areas of the IDE window:
Automatic number conversion[edit | edit source]
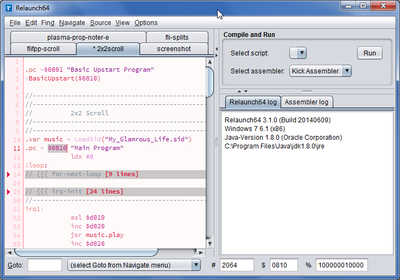
Type any numbers in the text fields at the bottom status bar to automatically see the converted numbers in decimal, hex and octal format. Furthermore, if you select a number in the source code, the converted values will also be shown in the conversion text fields. The following figure shows automatic conversion of the selection "$0810" and to collapsed code-folds:
Quick access to settings[edit | edit source]
In the textfield on the bottom left (see command Goto line) you can also enter specific shortcuts to quickly change settings. Currently implemented options are:
- aa - set normal anti-aliasing
- aas - set anti-aliasing to Subpixel
- aan - disable anti-aliasing
- cs - standard highlighting-mode
- csa - alternative highlighting-mode
- lal - left line-numbers alignment
- lac - center line-numbers alignment
- lar - right line-numbers alignment
- cf - collapse code-folds
- ef - expand code-folds
- slh - turn on/off line-highlight
- scb - show/hide close button on tabs
- cs<number> (e.g..: cs3) - change color scheme
- fs<number> (e.g..: fs11) - change font size
- ts<number> (e.g..: ts4) - change tab size
References[edit | edit source]
- ↑ Homepage of Relaunch64 with further information and downloads
- ↑ Download latest binaries and sourcecodes of stable builds at SourceForge
- ↑ Free Java-Download
- ↑ OS X binaries for ACME, 64tass and DASM are available at popelganda.de
Links[edit | edit source]
- Latest source code at GitHub
- Further screenshots at popelganda.de

